Computer Tips From A Computer Guy |
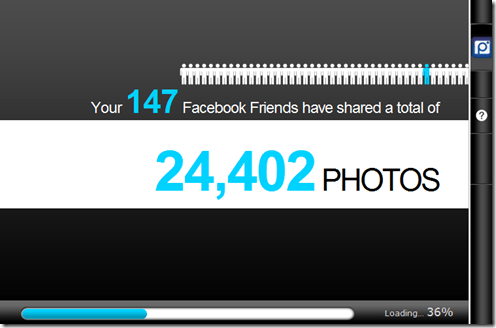
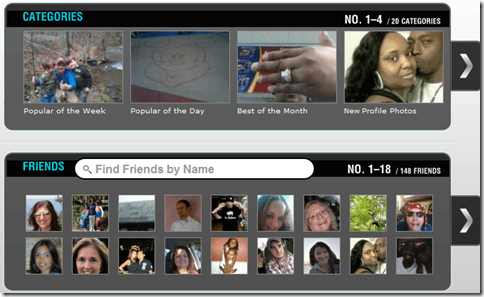
| View Slideshows of Your Facebook Friends Photos Posted: 17 Mar 2011 04:21 AM PDT Facebook users share thousands of pictures every day. While photo sharing helps us feel connected to our friends, if we have more than a few friends, the number of photos to view in a week can become insurmountable. A Facebook app called Pixable organizes all of your friends' photos into categorized slideshows, making them easier to view. Click Get Started on the Pixable homepage. Then, click Get Started on the next page, too. A window will appear asking you to allow the app to access your Facebook account. Click Allow at the bottom of the page. Pixable will then start loading your friends' photos. Depending on the number of friends you have, this could take a few minutes. One loaded, you friends' photos are sorted into categories. The first photos to appear are the most popular of the week. Click the home button at the top of the screen (it looks like a house) to see the other categories. The first row on this page are categories of photos. Click any of the categories to see the photos in a slideshow. The second row sorts photos by friend. Click any friend to see their photos in a slideshow. When in slideshow mode, there are many options. On the right of the screen, you can see who is tagged in the photo, leave a comment, or like the photo. At the bottom of the slideshow, you can decide if you want to see more photos like the one displayed, or share the photo via email or Facebook. Pixable is a great way to view Facebook photos. Thanks to the service, we saw photos from our friends we would have otherwise missed—photos that did not appear in our regular newsfeed. Besides this computer-based app, the service also offers an iPad app.
Related postsCopyright © 2007 Online Tech Tips. Aseem Kishore (digitalfingerprint: a59a56dce36427d83e23b501579944fcakmk1980 (74.125.94.89) ) Post from: |
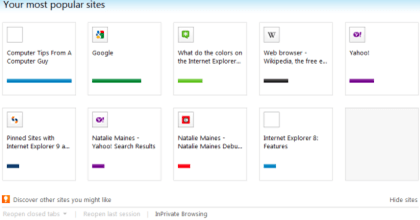
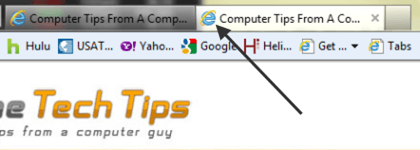
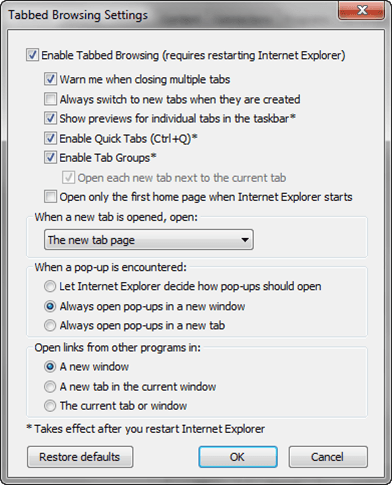
| How to Use Internet Explorer 9′s New Tabs Features Posted: 16 Mar 2011 05:31 AM PDT With the release of IE9, Microsoft has clearly upped its game as competition from Google, Firefox, Safari, Opera and others have prompted it to completely revamp its browser. One of these new features is in how users can use the New Tab features. To begin, when you first load IE9, you'll see the edge of the current tab as greyed out, …but if you hover over it, it turns to an image that represents a new tab: Clicking on that image brings up a new page filled with icons that show the sites you visit most often: If you hover over a page icon, a little "x" will appear that when clicked , causes the site icon to not appear on your new tab page anymore; also there is a colored bar that represents how "active" you've been with that site, compared to all the others you visit and a message that describes how active you've been. Note: There is a little link for disabling all of your most recently visited sites, at the bottom right of the list of sites. Below that, is a list of other sites IE thinks you might wish to visit based on your browsing history. Note: For Windows 7 users, you can pin any of the shown page icons to your taskbar by clicking on it and dragging it to your taskbar. What you see when you click on a New Tab icon is just the beginning of what Microsoft has in store for you, if you happen to have Windows 7 on your computer. For example, you can click on any tab favicon (the name given to the icon that is attached to the tab) and drag it down to your taskbar where it will be pinned. If you don't want it to be pinned, you can press the Shift key before clicking and dragging to your taskbar and it will then be shown as simply a running app. You can also rip a tab off of the browser session where it was first established by clicking and dragging its favicon to another part of the screen: Above is a browser session with two tabs before ripping off the second one; below is what it looks like after you rip off the second one: Note: You can also put the tab back where it came from by dragging it by its favicon back to the tab that spawned it. Also, Microsoft has added color to tabs to make it easier for users to tell which tabs go with which sites. For example, if you launch a website, than click on a link in that site, and it opens another tab, both the tab you started from and the new tab will be assigned the same unique colors. Microsoft calls this grouping and it helps you to see at a glance which tabs are associated with one another. The screen-cap below shows two sites in blue and two in yellow: Note: Colors are assigned automatically and you have to have at least two of them for IE to assign them a unique color as part of a group. You might also notice when you launch a new tab by clicking on a link in a tab, that the new one lines up next to the one that launched it, rather then being put at the end of the line. You can also move the positioning of the tabs on the tab bar by dragging them around left and right to move them to the position you prefer. IE 9 also provides a means for configuring how tabs work; to try some of them, click on the Tools (gear) icon, then choose Internet Options, then Tabs to get this popup window full of attributes you can alter to suit your needs: And finally, if you miss the old Quick Tabs from earlier versions of Windows, try pressing Ctrl-Q.
Related postsCopyright © 2007 Online Tech Tips. Aseem Kishore (digitalfingerprint: a59a56dce36427d83e23b501579944fcakmk1980 (74.125.94.89) ) Post from: |
| You are subscribed to email updates from Online Tech Tips To stop receiving these emails, you may unsubscribe now. | Email delivery powered by Google |
| Google Inc., 20 West Kinzie, Chicago IL USA 60610 | |


 5:27 AM




0 comments:
Post a Comment