Computer Tips From A Computer Guy |
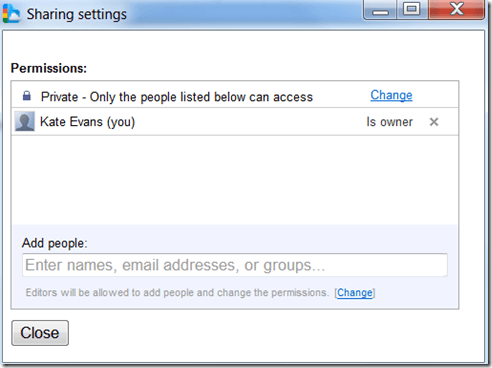
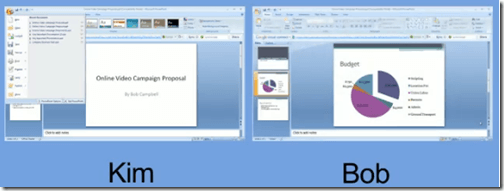
| Use Google Cloud Connect to Share and Backup Microsoft Office Files Posted: 01 Mar 2011 04:23 AM PST Google Docs is one of the most popular ways to share and collaborate with others on documents. However, the service often feels clunky, and lacks many of our favorite Microsoft Office features. Google Cloud Connect fixes this problem. Cloud Connect is a plugin for MS Office that automatically syncs Office files with an online backup, care of Google Docs. Cloud Connect works with Office 2003, 2007 and 2010, and Windows XP, .NET, Vista and Windows 7. To use the service, you must have a Google account. To start using cloud connect, click the blue download link on the left of the Cloud Connect page. After accepting Google's terms, the plugin's installation takes about a minute. A message will appear when the installation is complete. Open Word, Excel or PowerPoint. Across the top of the screen, just below the ribbon, you will see a message from Google Cloud Connect. Click Login and enter your Google account name and password. Decide if you want the application to sync your files automatically with online backups, or if you would prefer to do so manually and click OK. Save your file just as you normally would. After you do, Cloud Share updates to show a direct URL to your document. Clicking the link will display the file in Google Docs with the option to download it. To share the document with friends, click the Share button on the far right of the Word, Excel or PowerPoint screen. A settings menu will appear. From here, you can designate people with whom to share the file. You can also give other people permission to revise the file. Giving someone else permission to revise the file is one of the best features of Cloud Connect. If the other person has the Cloud Connect plugin installed, you can both edit the file at the same time, with each of your revisions showing on the other person's screen each time you save. The Google Cloud Connect plugin definitely makes Google Docs more useful. It streamlines the process of backing up files in the cloud, which we like. However, the plugin is meeting mixed reviews. Microsoft reports privacy issues and lost features with Cloud Connect. With MS Word, we did not experience any lost features, but we did notice our theme changed slightly in our PowerPoint test. Since the service is new, it probably has a few bugs to work out yet. For now, we are hopeful of Cloud Connect's success.
Related postsCopyright © 2007 Online Tech Tips. Aseem Kishore (digitalfingerprint: a59a56dce36427d83e23b501579944fcakmk1980 (74.125.94.88) ) Post from: |
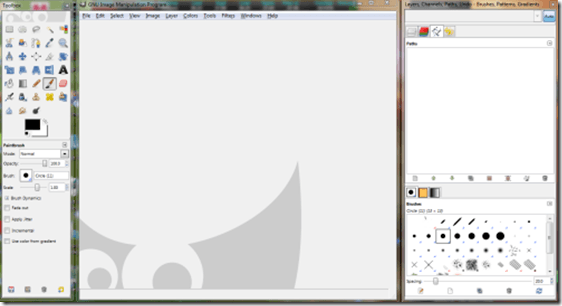
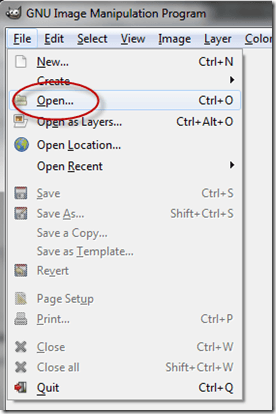
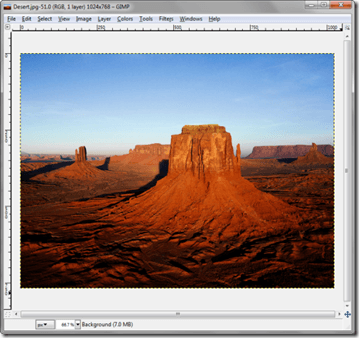
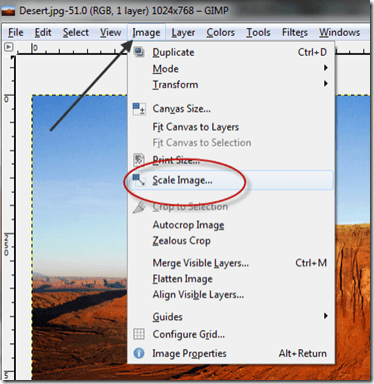
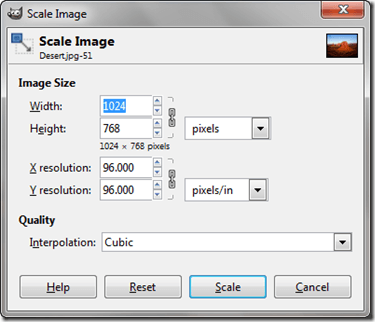
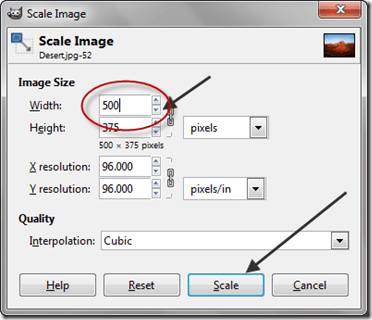
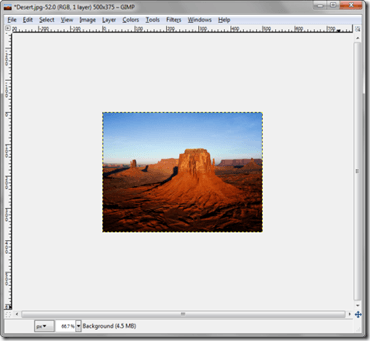
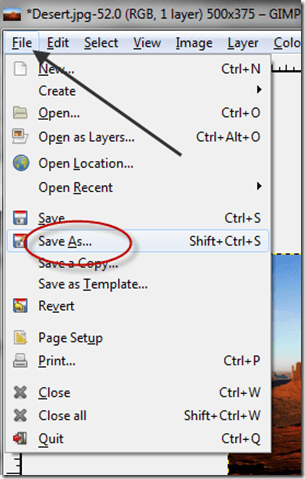
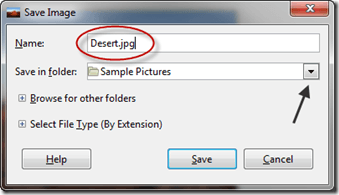
| How to Resize Images using GIMP Posted: 01 Mar 2011 03:17 AM PST The GNU Image Manipulation Program, is a free program that does most, if not all, of the things that can be done using Photoshop, which is great. The down side though is that a lot of people find GIMP a little difficult to use, which is too bad, because once you get used to how things work, GIMP is well worth the time invested. One feature of GIMP that is especially useful is the ability to change the physical size of graphics. This comes in handy when you have a photograph you want to use as an avatar on a social networking site, for example, or if you want to post pictures on your web page. To use GIMP to change the size of your image, you first have to get a copy of it, which you can get by going to the GIMP web page and downloading the program. Once you have GIMP downloaded and installed, you'll notice right away that it's different from other programs in that it comes in three distinct "pieces." Instead of just one main window; the main window that holds your images and main menu; a Toolbox window, and another window that is used for keeping track of things going on in the main window. It looks like this: When resizing images, you can ignore the two side windows and focus instead on just the main one in the middle. Click on File and then Open to load a graphic: Use the file manager to locate the file you want to resize, then click the Open button; it should look something like this: Next, click on Image in the main menu and then move down and click where it says Scale Image: You should get this popup: Since most applications tell you how large or small your image should be by width, you normally only have to change that, the height will change automatically to keep the image in the same proportions. To change the image size, use the arrows or simply type in the target number you're after. Once you've got it scaled to the size you want, click on the Scale button; the image should take up less (or more if you're increasing its size) of the main image window: At this point the size has only been changed on the screen though, to change the file size stored on your hard drive, click File on the main menu… …then Save As… to get the following popup: Type in a file name for the file and choose which folder you want to save it to, then click the Save button. Note: You can choose to click on Save instead of Save As, but doing so will overwrite your original graphic. That's it, to use your newly resized image, pull it off your hard drive with whichever application you're using.
Related postsCopyright © 2007 Online Tech Tips. Aseem Kishore (digitalfingerprint: a59a56dce36427d83e23b501579944fcakmk1980 (74.125.94.88) ) Post from: |
| You are subscribed to email updates from Online Tech Tips To stop receiving these emails, you may unsubscribe now. | Email delivery powered by Google |
| Google Inc., 20 West Kinzie, Chicago IL USA 60610 | |


 5:14 AM



0 comments:
Post a Comment