Computer Tips From A Computer Guy |
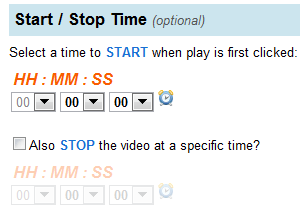
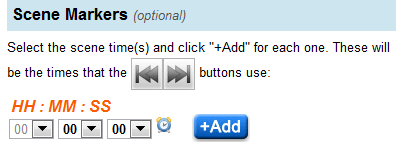
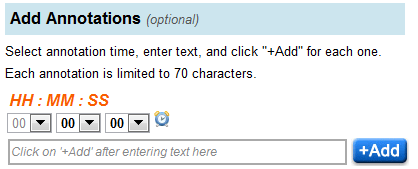
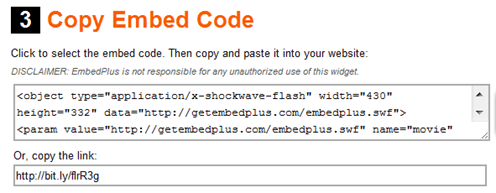
| Add Custom Controls and Features to Embedded YouTube Videos Posted: 28 Feb 2011 04:50 AM PST YouTube's controls are rather limited. We can play, stop, fast forward, rewind or watch videos in full screen… and that is about it. Over time, YouTube has added a few features, but not fast enough to please the masses. EmbedPlus gives many more controls and features to YouTube videos. With a few configurations, you can add the ability to crop, zoom, annotate, play in slow motion, skip scenes and instantly replay. To start, copy the URL of a YouTube video, then click the Get Started button the EmbedPlus homepage. Paste your YouTube URL and click Next. On the next screen, there are many options for enhancing the YouTube video. First, you can change the size of the video display, and choose whether or not it should load in HD by default. Next, you can choose a start an end time for the video. This is completely optional. You can also set scene markers. Doing this adds a chapter control, like those found on DVDs. This allows watchers to flip to different scenes in the video. Real-time reactions from Twitter and YouTube comments can also be displayed as the video plays. Lastly, you can insert your own comments to show at certain times within the video. These are called annotations. When you have made all of your selections, click Get Code. You then have the choice of either copying and pasting an embed code on the Web site of your choice, or copying and pasting a link directly to the video. EmbedPlus' video player adds even more controls, including the ability to replay, watch in slow motion, and even zoom in on the video. EmbedPlus has nice added features for YouTube videos. We have seen many of these features offered in other services around the Web, but not all in once place. For this reason, EmbedPlus is worth a bookmark.
Related postsCopyright © 2007 Online Tech Tips. Aseem Kishore (digitalfingerprint: a59a56dce36427d83e23b501579944fcakmk1980 (209.85.224.86) ) Post from: |
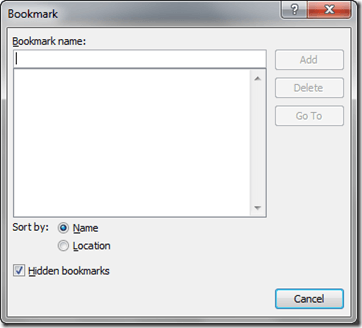
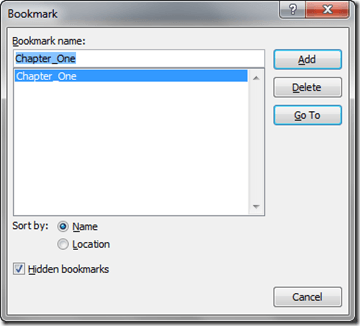
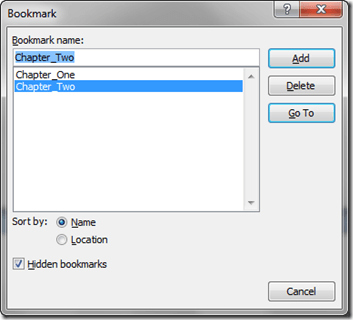
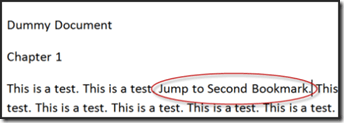
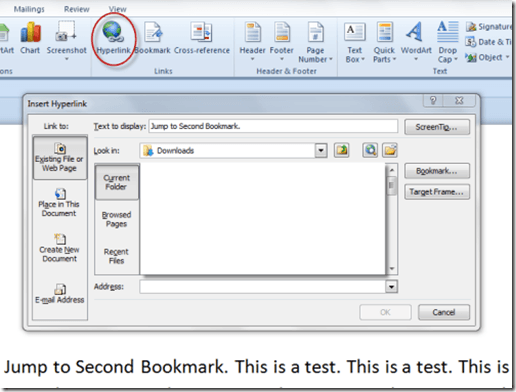
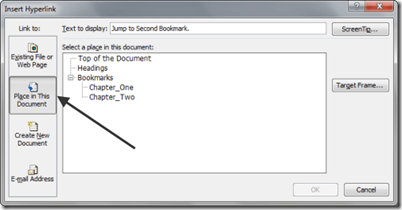
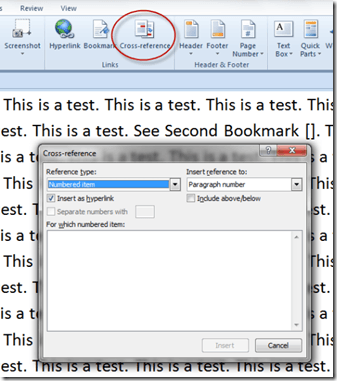
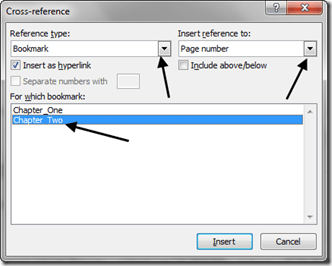
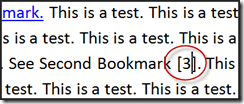
| Create and Use Bookmarks in MS Word 2007/2010 Posted: 28 Feb 2011 03:09 AM PST Bookmarks are a feature that has been present in Word for several iterations but have never really been used by most people. With Word 2007 and now 2010 though, Microsoft has made it easier to create and use bookmarks, so if you've ever considered jumping in, now's the time. To see how bookmarks are created and used, first create a dummy document with a lot of text and pages in it. Then, divide your document into sections; in this example, we've created a dummy document that is eight pages long with four chapter headings in it. Next highlight the text you're using for your first section heading, then click on the Insert tab on the main ribbon. The Bookmark icon is near the center of the Insert ribbon: Clicking on it brings up this popup window: Type in a name for your first bookmark in the Bookmark name window. Then, click the Add button. The little popup window will go away and it will appear as if nothing happened. But it has, to see for yourself, click on the Bookmark icon again. Your new bookmark should now be showing in the box underneath where you typed it in, this is the display box that lists all of your bookmarks. Note: Bookmark names can consist of numbers or letters or an underscore, but no blank spaces. Next, move down in your document to the second section heading, and do the same thing with it, e.g. highlight it, then click once again on the Bookmark icon, then type in the name for it, then click the Add button to create your second bookmark. With that done, you're now ready to see how to use bookmarks. Click once more on the Bookmark icon, and you should see something like this: Now highlight the first bookmark you created and click the Go To button. You should see that you have been taken to where your first bookmark resides. Click on the Bookmark icon again, and do the same for the second bookmark and you will be taken back. Note: You can also double-click the bookmark name instead of clicking on the Go To button to go to the desired bookmark. For long documents, creating bookmarks for jumping around using bookmarks is an incredible time saver. They are also very useful for holding your place in a document, like say if you're editing a document and want to stop and work on it tomorrow. Just create a bookmark at that point and jump to it when you open your document the next time. But, that's not all you can do with bookmarks of course; you can also use them in conjunction with the Hyperlink and Cross-Reference tools. To see how to use bookmarks with Hyperlinks, go to your first section heading again, then somewhere in your first line of text, change what you've typed to "Jump to Second Bookmark." Like this: Highlight the words "Jump to Second Bookmark" and then click on the Hyperlink button, which is right next to the Bookmark button. You should get a popup window that looks like this: Click on the Place in This Document icon: You should see a tree listing your bookmarks; click on your second one, then click the Ok button. The Hyperlink popup window should disappear and when you're returned to your document you should see that your highlighted text has changed color and is now underlined. This means you have created a hyperlink, just as if you had created one to a web page. To use your new hyperlink, hover over it till the tiny popup appears like this: Press the Ctrl key on your keyboard and hold it down while you click your left mouse button. You should be taken to your second section heading. In addition to using Hyperlinks to jump to places in your document, you can also use bookmarks with the Cross-Reference tool; to see how, do this; type "See Second Bookmark []" somewhere in your text, like this: Click in-between the brackets, to make it the current position in your document, then click on the Cross-Reference icon (on the other side of the Bookmark icon); you should get the following drop-down menu: Use the down arrow to select Bookmark, as the Reference type, and Page number for Insert references to: Then click on your second bookmark to select it: Click the Insert button, then the Close button to return to your document. You should see that a number has been inserted into your document… …this number represents the page number where your second section heading resides. As you can see, bookmarks are both versatile and very useful, especially for longer documents. The more you use them, the more you're likely to come to rely on them.
Related postsCopyright © 2007 Online Tech Tips. Aseem Kishore (digitalfingerprint: a59a56dce36427d83e23b501579944fcakmk1980 (209.85.224.86) ) Post from: |
| You are subscribed to email updates from Online Tech Tips To stop receiving these emails, you may unsubscribe now. | Email delivery powered by Google |
| Google Inc., 20 West Kinzie, Chicago IL USA 60610 | |


 5:34 AM







0 comments:
Post a Comment