Computer Tips From A Computer Guy |
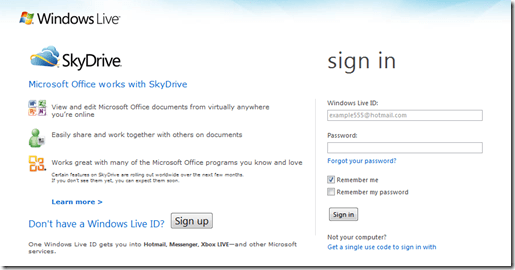
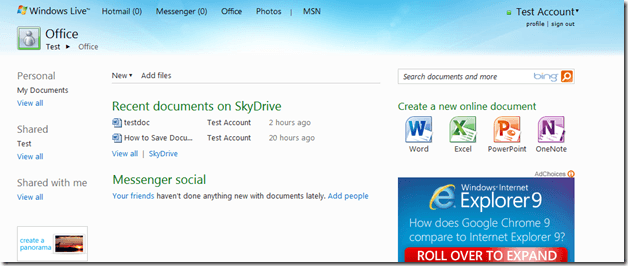
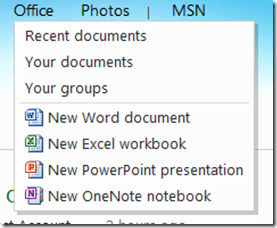
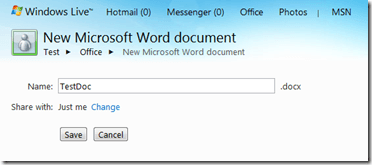
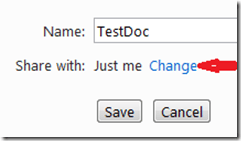
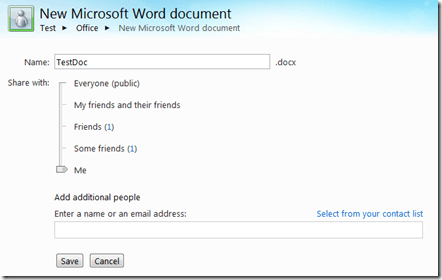
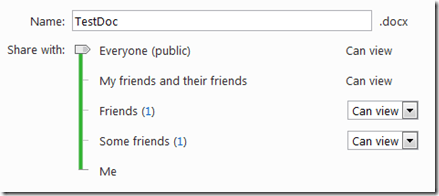
| How to use Microsoft Office Live Posted: 17 Feb 2011 04:25 AM PST When Microsoft announced the release of Office 2010, it also announced a parallel version of its ubiquitous suite of office products that would reside on the "cloud" or in more down to earth terms, on the Internet. Microsoft Office Live is comprised of an online version of Word, Excel, PowerPoint and OneNote; all of which can be accessed and used completely free of charge, at least for now. To gain access to Microsoft Office Live, you must first create a Windows Live account. If you don't have one already, go to the Windows Live Sign In/Up page and create one buy clicking on the Sign Up button. Once you've logged in you'll be greeted with the Windows Live Welcome Screen: Notice the menu across the top of the screen: If you hover over the Office menu choice, a popup will appear: Recent Documents, are any documents you have uploaded to Windows Live via SkyDrive, or any of the Office applications, whether to your personal space or to a group. Your Documents, are those documents that you have uploaded to Windows Live that can be seen only by you. Your Groups, are the groups that you have either created or joined on Windows Live. Windows Live groups are the means by which groups of people can share files with one another. To use the Microsoft Office Applications, either click on them from the drop-down menu under the Office main menu choice, or click on one of the icons on the right hand side of the Welcome Page. Windows Live applications differ in their approach to file naming from computer based application in that in order to start a document, you must first give it a name, rather than creating it first and then giving it a name. Clicking on the Word Live application icon causes a screen to appear asking you for the file name: Next, choose whether to share the document with others, or to keep it private by going with the default of "just me" by clicking the Save button. If you wish to share the document, click on the word Change, highlighted in blue. Clicking on Change will bring up a screen with a scroll bar that allows you to adjust the degree of sharing you wish to use for the file you are creating. Choose the degree of sharing by moving the scroll bar up and down to coincide with the option levels on the right. As you move up from yourself Me, to Everyone (public), little drop-down menus appear to the right of each choice. These drop-down menus allow you to specify whether those that you chose to share with Can View or Edit the documents that you are allowing them to access. Note: Clicking on the little numbers next to the Friends options, launches a little popup window that shows a list of your current friends. You can also add additional people to your list of those you wish to share the document with by entering their name in the Add additional people box: Note: To add people, they have to be in your Hotmail contact list. Once you have the document named and sharing for it all set up, you'll be taken to the actual application, below is the Word application. The Word Live application works mostly the same as the PC based application for the functions that are there; which are mainly those for formatting text and some graphics. In other words, Word Live is a truncated version of the normal PC based application; this is true of all four of the Windows Live Office applications. Note: Though Word Live and the other three applications do allow you to save a file created online to your local computer (or open it in your local version of Word), it generally only works if you're using Windows Explorer, and have the proper Active-X plug-in. Below is the Excel Live screen: The PowerPoint screen: And finally, OneNote: Windows Live Office is clearly just an initial foray into true cloud computing and though the current suite is eminently useable, it's likely to be much more robust in future offerings.
Related postsCopyright © 2007 Online Tech Tips. Aseem Kishore (digitalfingerprint: a59a56dce36427d83e23b501579944fcakmk1980 (209.85.224.87) ) Post from: |
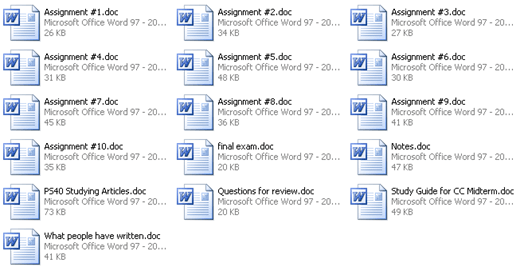
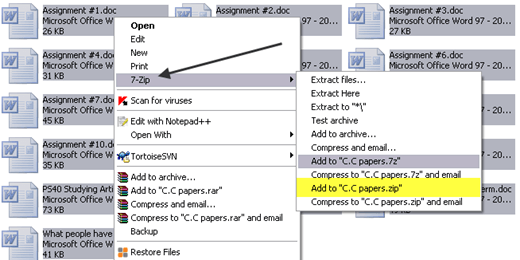
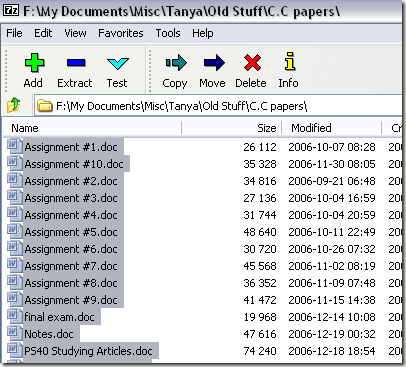
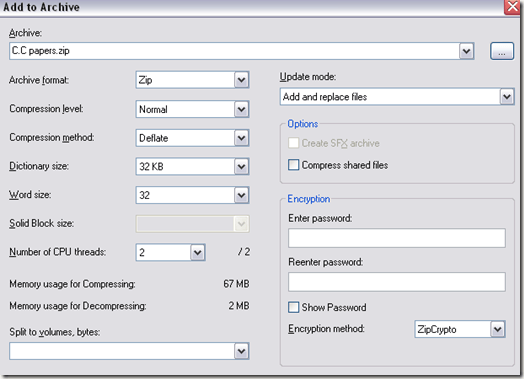
| Posted: 17 Feb 2011 03:34 AM PST I find myself constantly running into the dilemma of having to send a large number of small files to someone and having limits on the number of attachments. Not only do you have restrictions, but you also spend more time attaching a bunch of files to an email. That's where creating a ZIP file comes in. You can take 100 hundred files and zip them into a single file! Then all you have to do is attach one file to your email. Of course, the recipient has to be able to unzip your files, but Windows and OS X both have built-in features to extract and open ZIP files. The easiest way to create a ZIP file is to download a free ZIP utility. My favorites are WinZip or 7-Zip. I personally like 7-Zip since it's completely free. WinZip can be used on an indefinite trial, but you have to pay $30 to get rid of the annoying messages and pop-ups. In this post, I'll walk through the steps for creating a ZIP file using 7-Zip. Step 1: First navigate to the folder where your files are located. Note that you can also zip an entire folder if you like! So if you have a main folder with many sub-folders, which in turn have lots of files, then navigate to the top most folder. In my case, I want to zip a bunch of Word documents, so I go to the folder with all of the files. Step 2: Now select all the files and then right-click on them. WinZip and 7-Zip both add an option to zip to the context menu in Windows. Step 3: Now choose the option that says "Add to foldername.zip". This option will automatically compress the files and create a zip file with the name set to the name of the folder. The file will be created in the same folder as the files. That's it! You now have created your own zip file with whatever data you choose. Note that if you don't have the context menu option, you can manually open 7-Zip or WinZip to create the zip file. For example, you can open 7-Zip and browse to the folder where you have the files you want to zip. Select all the files and then click on the Add button. The Archive dialog will pop up with all of the options for creating your ZIP file. You don't have to worry about most of the stuff here, but you can choose a location for the new zip file, give it a different name and add encryption if you like. You can also change the zip format to something other than .zip, such as .tar or .7z. Click OK and your zip file will be created. Easy as that! Also, if you need your files to be smaller in size, you can read our previous post on 7-Zip vs WinZip compression test. We also did a test between 7-Zip and WinRar. Enjoy!
Related postsCopyright © 2007 Online Tech Tips. Aseem Kishore (digitalfingerprint: a59a56dce36427d83e23b501579944fcakmk1980 (209.85.224.87) ) Post from: |
| You are subscribed to email updates from Online Tech Tips To stop receiving these emails, you may unsubscribe now. | Email delivery powered by Google |
| Google Inc., 20 West Kinzie, Chicago IL USA 60610 | |


 6:12 AM






0 comments:
Post a Comment