


 5:21 AM

Computer Tips From A Computer Guy |

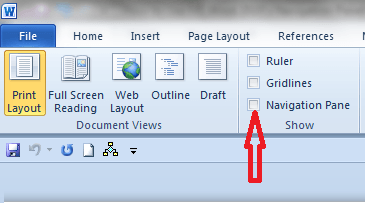
| How to Use MS Word 2010′s Navigation Pane Posted: 12 Feb 2011 03:48 AM PST Now that Microsoft Office 2010 has become firmly entrenched in the marketplace, it's time to look at some of the truly useful additions Microsoft has made to its suite of products. In this post, we'll look at the Navigation Pane, something Microsoft created for Word 2007, but has greatly improved with its latest iteration. The Navigation Pane in Word 2010, sits almost hidden under the View Ribbon.
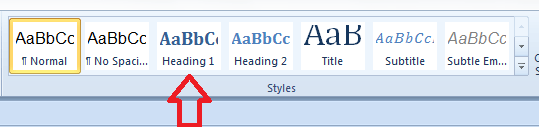
Unfortunately, a lot of Word users have checked that little box only to find that it didn't do much for them. This usually comes about because the Navigation Pane is generally only useful on longer documents, and especially those that use style headings (check out another post How to Use Styles in Microsoft Word for a more in-depth look at styles). To get at the full power of the Navigation Pane, create a test document at least three pages long. Then create a header line on each page by highlighting the header text and then clicking on Heading 1. Note: Each header should be on a line by itself.
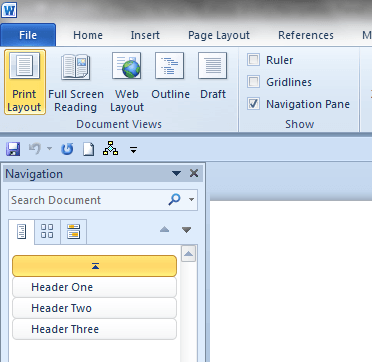
Do the same for the other two headers on the other two pages you created. Then, click the View menu choice to bring up the View ribbon, and after that click the Navigation Pane Show check box. You should get something that looks like this:
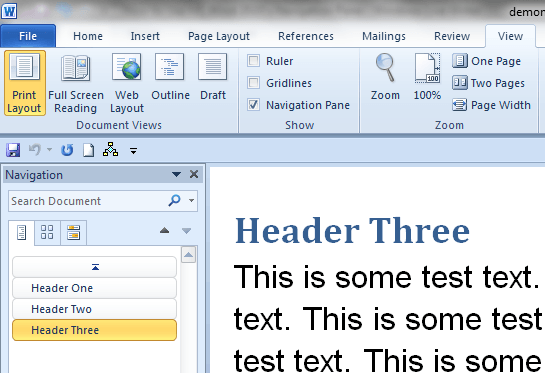
Notice how the names of the Headings you created are listed in the Navigation Pane window. Click on the third header you created, you should see something like this:
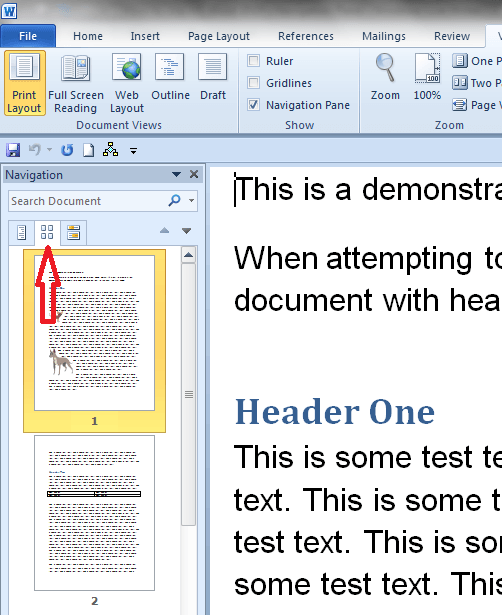
Clicking on the various headings moves you to that place in your document where that heading exists. Try clicking on the second header you created, then the first; this is just the beginning of what the Navigation Pane can do for you. Next, click on the middle icon in the Navigation Pane:
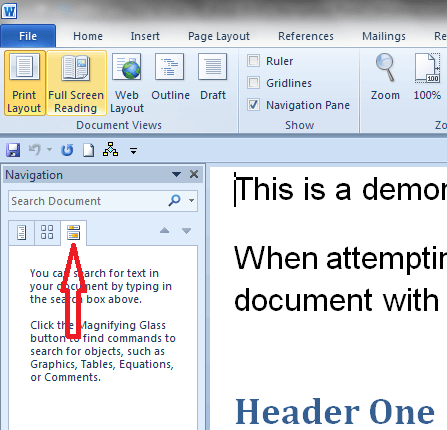
The middle icon shows you a mini-page preview of your document, and once again, if you click on any of those mini-pages, you will be taken to that page. Next, click the search icon on the right. This little gem allows you to jump to different places in your document based on search results for words, graphics, tables,equations, footnote/endnotes and comments.
To do searches, you click on the little magnifying glass icon.
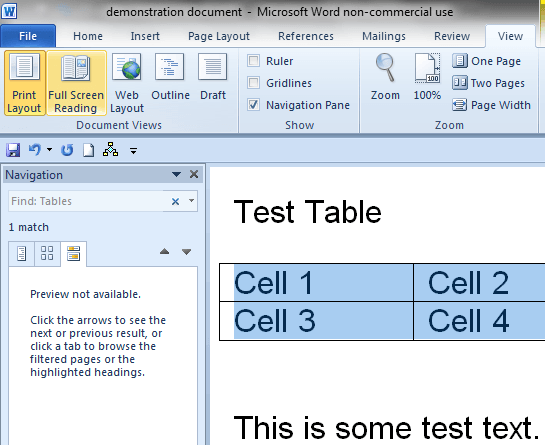
To see the power of this feature, move down in your document to a random place and create a small table; then move down in the document some more and create another table. After that, insert two or three graphic images in various places throughout your test document. Once you have all that done, go back to your Navigation Pane and click on the Magnifying Glass Icon and choose Tables from the drop down menu. You will be taken to the first table in your document.
Now click the little Down arrow icon
Successively clicking on the Down arrow takes you to the second, third, fourth, etc. table. Clicking the Up arrow next to it does the reverse. Next, click the little X that took the place of the Magnifying Glass Icon when you did your search. Doing so will bring back the Magnifying Glass Icon.
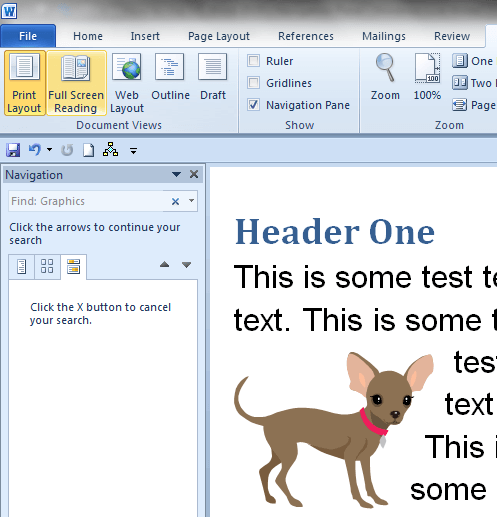
Click on the Magnifying Glass Icon again, only this time choose Graphics from the popup menu; this time you will be taken to the first graphic image in your document, and then successive ones when you click on the down arrow.
Using the Magnifying Glass Icon you can search for words, graphics, tables,equations, footnote/endnotes and comments In summation, when used with long documents with style headings, the Navigation Pane can save wordsmiths a lot of time.
Related postsCopyright © 2007 Online Tech Tips. Aseem Kishore (digitalfingerprint: a59a56dce36427d83e23b501579944fcakmk1980 (74.125.94.82) ) Post from:
|
| BitPim User’s Guide – What You Need to Get Started Posted: 11 Feb 2011 04:56 AM PST Although smart phones such as the iPhone, Motorola Droid, Blackberry Bold, etc., have quickly become the most popular mobile devices, some cell phone users still prefer simplicity over apps. Many cell phone users just don't have a need for all of the fancy features that smart phones offer. Rather, they make calls, text, and that's about it. One advantage of smart phones is that they have the ability to add ringtones, wallpapers, YouTube videos, or just about anything else you would like, simply by using an app… The easy way. But how do you add ringtones, wallpapers, and other cool stuff to a normal cell phone? That's what BitPim is for.
Well, BitPim will work for many smart phone/high-end phones as well; but most likely, you will not need to use BitPim for those phones, as there is an app for that. The normal way to get a ringtone for a cell phone is to pay a fee of a couple of dollars to your carrier, and simply download the ringtone to your cell. Although this is the most convenient way to get ringtones, it does hold several limitations. For example, many ringtones are censored for profanity. Also, you can only choose from ringtones that your carrier offers. Chances are, they may not have a ringtone available for the song you are looking for. Yet another disadvantage of cell phone service provider ringtones is that they are non customizable. The song clip to be used for the ringtone is already selected, you cannot always have your favorite verse of a song.
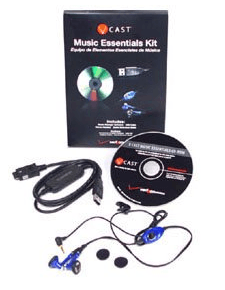
BitPim allows you to create your own ringtones out of any song. You can choose which portion of the song to use for the tone as well. Here are some things you will need to get started:
Chances are, you have access to everything above except for the USB to phone transfer cable. You can find these for your specific phone on eBay for approximately $3.00. If you want to get started ASAP, you can head down to your local AT&T, Verizon, T-Mobile, etc., and they should have them for sale.
Another thing that should be mentioned, BitPim can mess up your phone's firmware. BitPim is a program that is capable of doing much more than just adding ringtones and wallpapers. If you go through and delete files that you shouldn't, this could render your phone unusable. Thus, we will not be responsible for anything that happens. However, I would still recommend that you try out this tutorial, as BitPim is a very cool program once you learn how to use it. With a little common sense, you should have nothing to worry about. Once you have BitPim installed on your computer, go ahead and launch it to get started. *Another item that should be addressed right now, some users have reported problems with installing BitPim under Windows 7 and Vista. BitPim does officially support Windows 7 and Vista. However, trying to run BitPim may give you an error stating that a certain msvcp71.dll file is missing. To fix this error, you may need to download this file, and move it to the directory Start > Computer > C: > Program Files (X86) > BitPim. All of that preparation and we still haven't added a ringtone yet! Well, it's definitely worth it once you learn BitPim and get it up and running. Be sure to proceed on to part 2 of our BitPim User's Guide where you can get started adding ringtones, wallpapers, and more.
Related postsCopyright © 2007 Online Tech Tips. Aseem Kishore (digitalfingerprint: a59a56dce36427d83e23b501579944fcakmk1980 (74.125.94.82) ) Post from:
|


| You are subscribed to email updates from Online Tech Tips To stop receiving these emails, you may unsubscribe now. | Email delivery powered by Google |
| Google Inc., 20 West Kinzie, Chicago IL USA 60610 | |
0 comments:
Post a Comment