


 5:24 AM

Computer Tips From A Computer Guy |

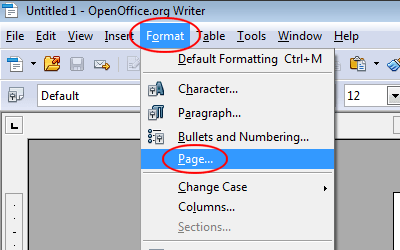
| Add Columns to an OpenOffice Writer Document Posted: 08 Jan 2011 03:57 AM PST Although OpenOffice Draw is a better application for desktop publishing, Writer is capable of some intermediate formatting to make your document look the way you want it to look. Adding columns to a Writer document is quite simple. However, you may have to edit a column setting a bit to get it just right. Learn how to add and edit columns in an OpenOffice Writer document. Why Add Columns to Writer?The standard Writer document consists of only one column. Most people don’t think of it that way but if you do, it will make it easier to visualize how you want your document to look with multiple columns. Adding columns simply splits the current single column in a standard Writer document into multiple columns. Columns in a document require margins so the text or content in one column doesn’t run into the next. Oddly, the default margin between multiple columns in Writer is zero. Therefore, each time you add columns to a Writer document, you should edit the settings to add some spacing. Adding Columns to an OpenOffice Writer DocumentOpen up a new Writer document and click on Format>Page. This opens the Page Style window where you can edit the current document’s settings.
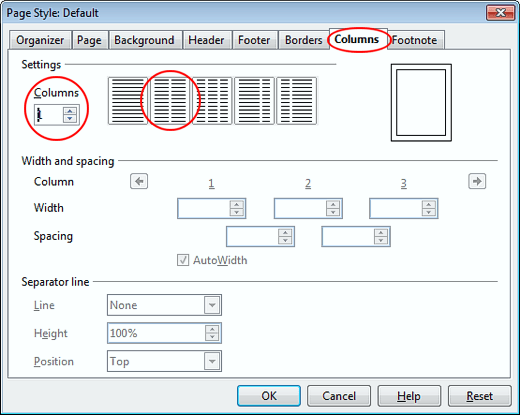
Click on the Columns tab and locate a section of the window labeled Settings. Let’s add two column to the current document. You can do this in two ways. You can change the Columns variable to 2 or you can click on one of the pre-defined page layouts. Choose your method to add two columns to the page.
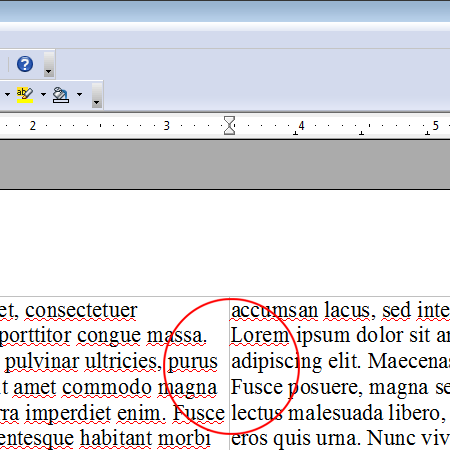
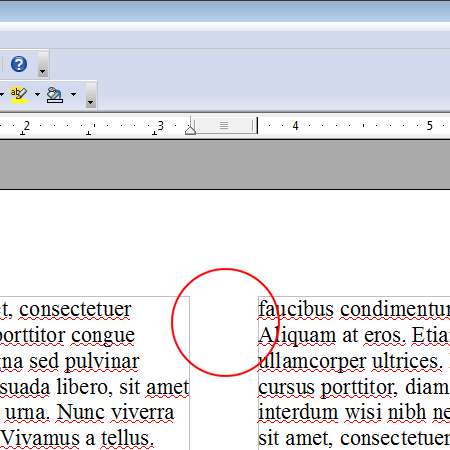
Click the OK button and notice that your document now has two columns. Note that the columns have no margin between them; the text from one column runs right into the text in the other.
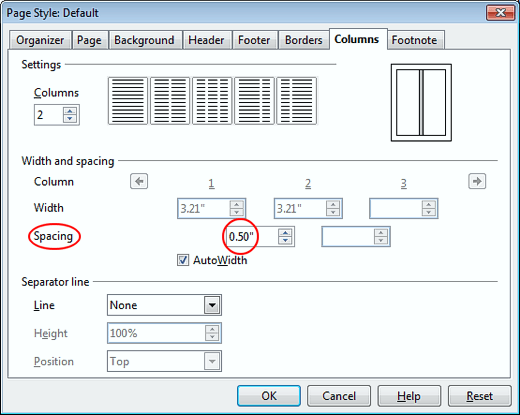
To correct this, click on Format>Page again and click on the Columns tab. In the section labeled Width and Spacing, locate the variable labeled Spacing. Click the spacing up to about 0.50″ and click the OK button.
Note that there is now a space between the two columns. Keep in mind that editing the space between columns will make your document longer. Therefore, you should really set up the columns and the spacing between them before you add text to your document.
How big a margin you should place between your columns depends on the visual effect you are going for. For professional documents, consider about 0.50″. For newsletters and other casual documents, 0.25″ is enough. Smaller spacing can also work, especially if you have pictures or clipart in your document that breaks up the text. Adding columns to an OpenOffice Writer document is a simple procedure. By default, Writer places no spacing between the columns, creating a cramped look. Editing just one option lets you add a margin between columns to create a more professional appearance. Play with the margin until you get exactly the look you want for your document. With a little practice, you can create a professional or casual look in no time.
Related postsCopyright © 2007 Online Tech Tips. Aseem Kishore (digitalfingerprint: a59a56dce36427d83e23b501579944fcakmk1980 (74.125.94.80) ) Post from:
|
| Find, Resize and Position Photos for Your Blog Posted: 07 Jan 2011 04:36 AM PST One of the on-going challenges for most bloggers is finding meaningful photos with the proper reuse rights. There are many databases available to search for photos, but searching these databases is time consuming. Besides, when the right photo is found, we must still resize it and provide the proper credit to the photographer. Wylio.com offers an easy solution for finding blog photos. The site is part photo search engine and part layout creator too.
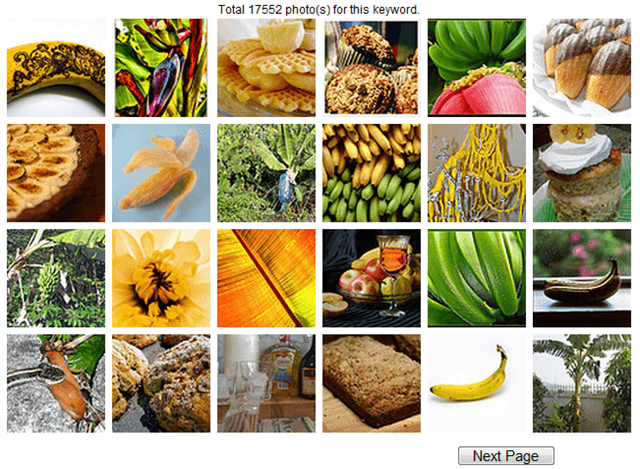
For finding photos, Wylio works similarly to Google Images. Simply enter a keyword for the kind of photo you seek an click search.
Instantly, thumbnails start appearing below the search box. Click the thumbnail for the picture that best suits your needs.
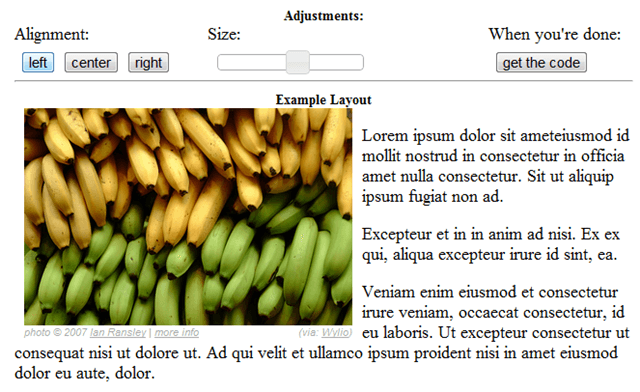
Clicking the photo opens it in a new window which simulates a sample blog layout, complete with Lorem Ipsum text. From here, you can resize the photo by sliding the bar beneath size, or align the picture to the right, left or center by clicking the corresponding word at the top of the page.
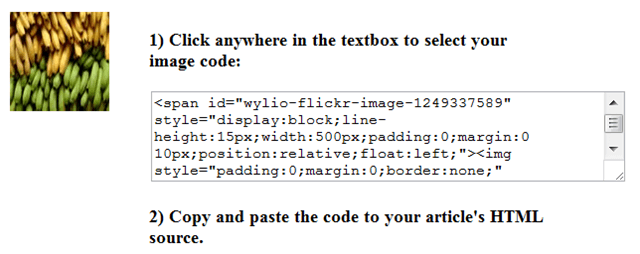
When you have finished making adjustments, click the Get the Code link at the top of the page. HTML is then generated for the layout you created, complete with a proper photo reference. Copy and paste this code into the source section of your blog writer, and then write your article.
For bloggers, Wylio is a must-have bookmark for those days when you just cannot seem to find a decent photo. Every photo in the database has a Creative Commons license, so all photos are ok to use with the proper references—which Wylio even provides. Most of the photos are of excellent quality, too.
Related postsCopyright © 2007 Online Tech Tips. Aseem Kishore (digitalfingerprint: a59a56dce36427d83e23b501579944fcakmk1980 (74.125.94.80) ) Post from:
|

| You are subscribed to email updates from Online Tech Tips To stop receiving these emails, you may unsubscribe now. | Email delivery powered by Google |
| Google Inc., 20 West Kinzie, Chicago IL USA 60610 | |
0 comments:
Post a Comment